Pages

Wednesday 23 July 2014

Cheddar Cheese Chiffon Cupcakes


I am down with flu. But itchy hands just cannot seem to stop doing things. So in the end, I went ahead and baked some chiffon cupcakes for my children's breakfast and snack. The hubby took a couple to eat and proclaimed it the best cupcake ever! (*smile*)

Soft and fluffy cakes that is filled with the fragrance of the cheddar cheese and milk. Perfect marriage of the ingredients, I would say.

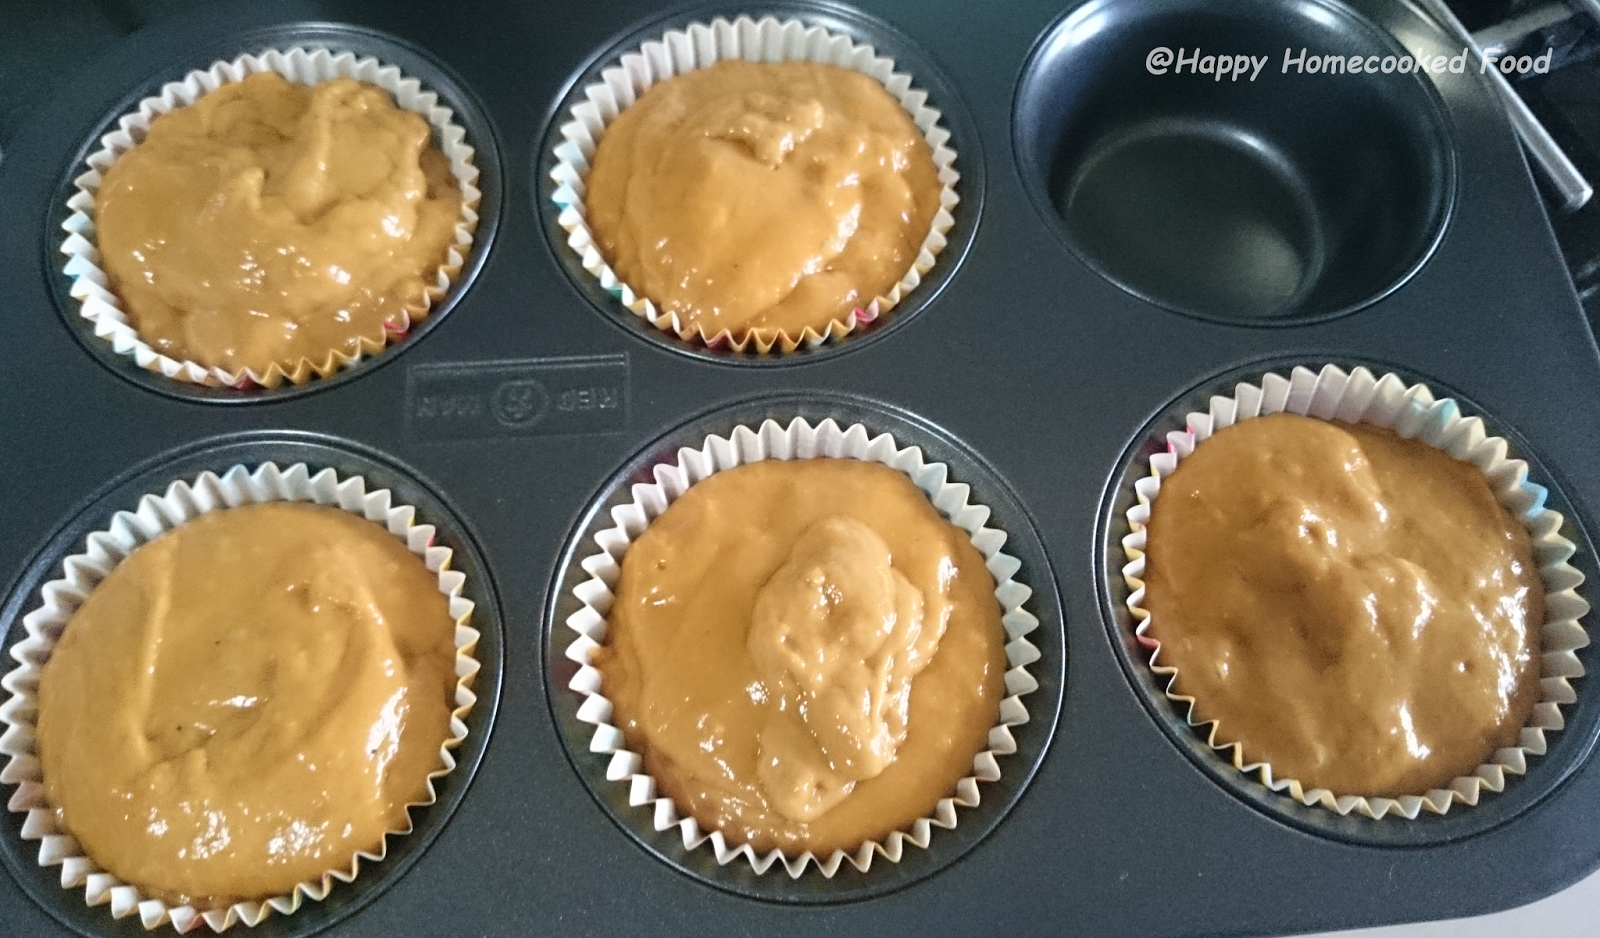
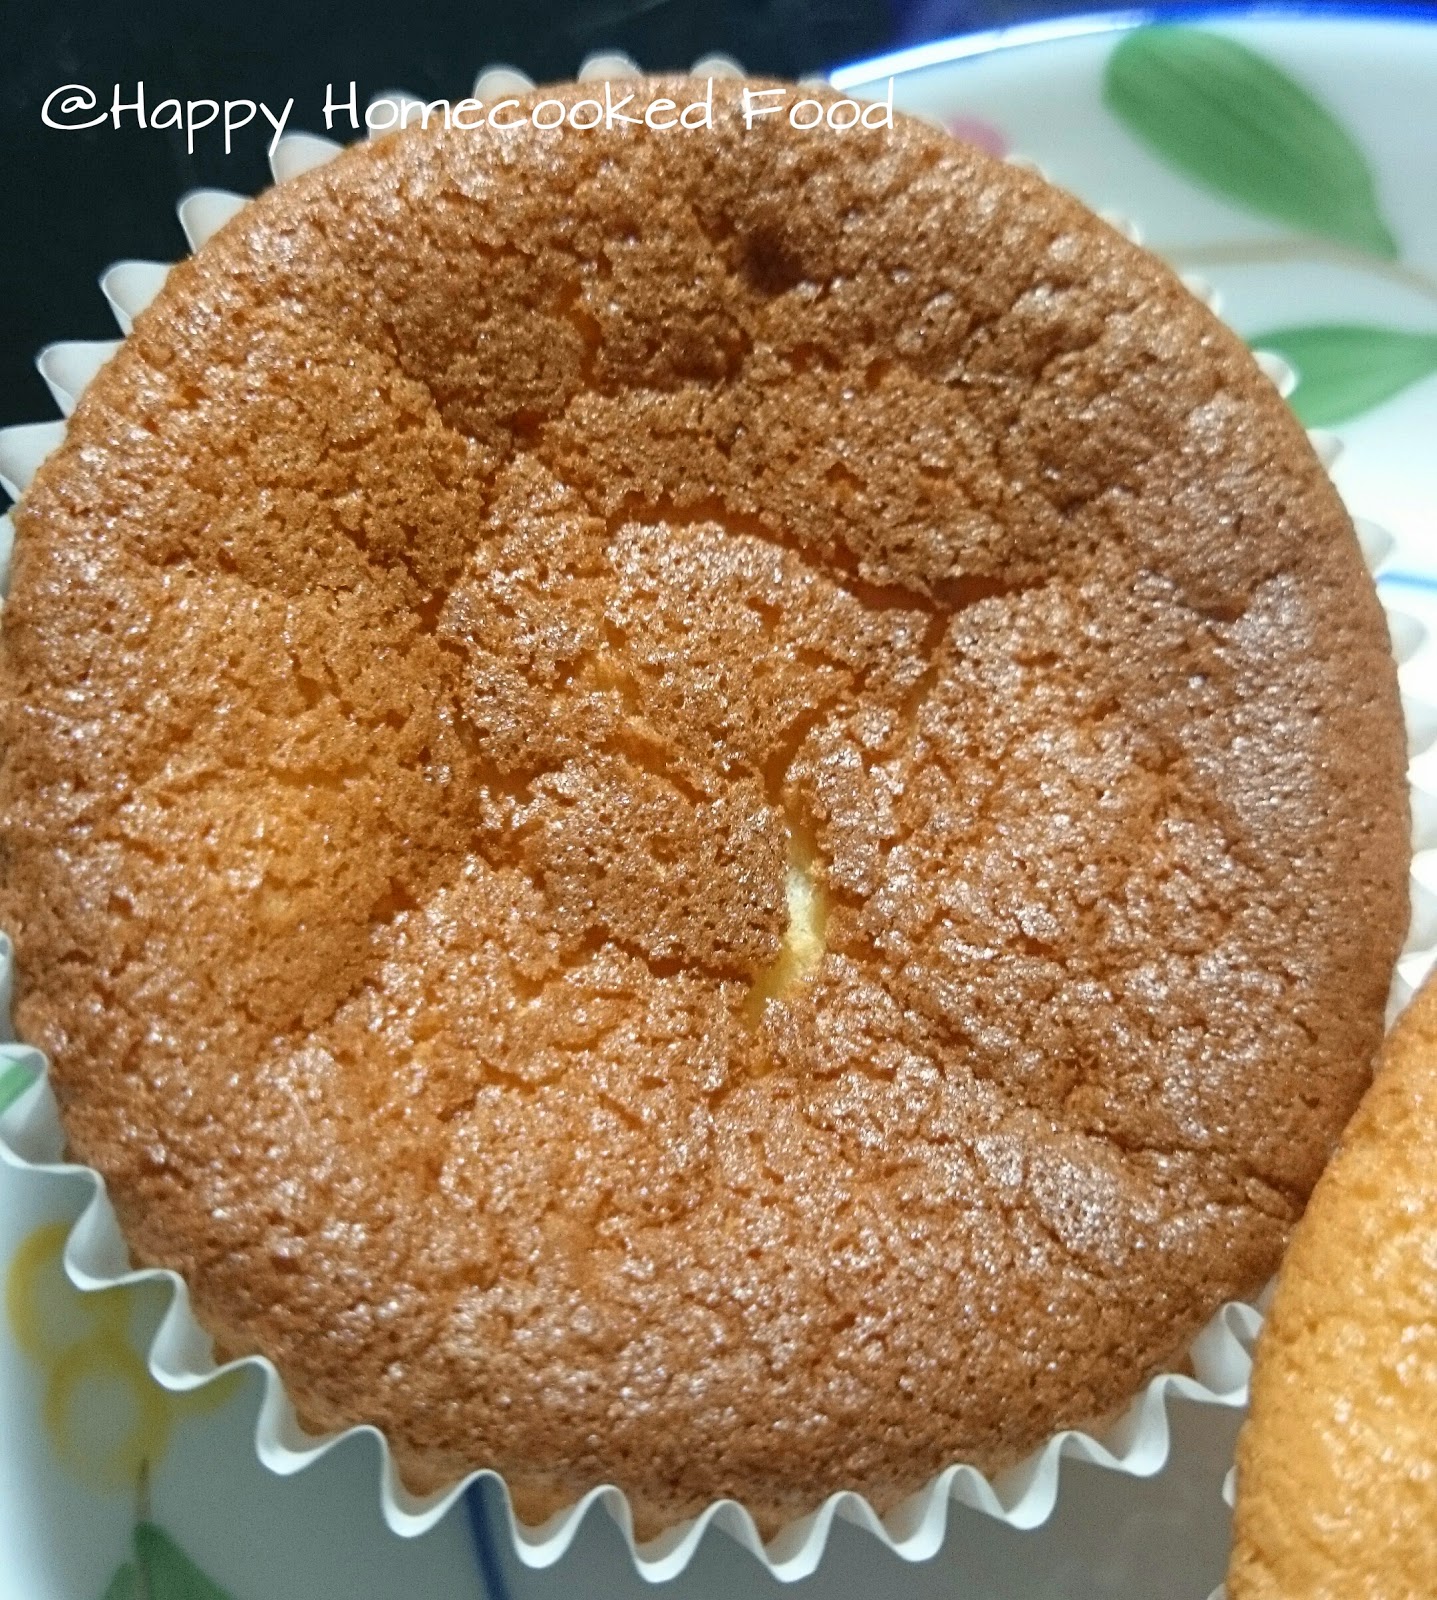
Sorry there isn't much pictures this round as I was quite sick. I am already quite surprised that I was able to finish baking the cupcakes without any mistakes, let alone take pictures. So limited pictures, do forgive me. I shall take more pictures the next round and post it up again.

Here's the recipe...


Cheddar Cheese Chiffon Cupcakes (Makes about 10 - 12 large cupcakes)

80g cake flour
1/4 tsp baking powder
75g full cream milk
2 egg yolks (from large egg)
25g castor sugar
50g cooking oil
2 slices cheddar cheese
1/8 tsp salt


3 egg whites (from large egg)
60g castor sugar


Directions

In a saucepan, heat the milk and cheddar cheese until the cheese melt. Do this with low heat and do not boil the mixture. Set aside.

Preheat oven to 180 degree Celsius.

In a large mixing bowl, hand whisk the egg yolks and 25g of castor sugar until it becomes pale yellow and thick.

Add in cooking oil and salt. Mix to incorporate.

Add in the cheese mixture and mix until combined.

Sift the baking powder and flour into the mixture and whisk until just combined. Set aside.

Using a electric whisk, whisk the egg whites until it turns foamy. Gradually add the sugar in in 3 batches while still whisking. Whisk until almost stiff peak form.

Add 1/3 of the egg whites into the egg yolk mixture and fold in until almost even. Do the same for the remaining egg white in 2 batches. Scrape down thoroughly and fold in until just combined. Do not over-fold. Bang bowl on the tabletop a couple of times to get rid of big bubbles in the mixture.

Fill the pre-lined bowls with the mixture until about 3/4 full. Bake the cakes for about 20 mins or until inserted toothpick comes out clean.

Transfer cakes to wire racks to cool.


Hope you will like this recipe!

Tuesday 15 July 2014

Grape Chiffon Cupcakes


Haven't been baking much in my oven lately as I was so busy with the kids and tuition. But last night, I realised that I have plainly forgotten about my son's school snack (Bad mummy!), I decided to do up a chiffon cupcake. I have been wanting to try chiffon cupcakes for a very long time but keep putting it off.

Due to me doing this quite last-minute, I used the grape juice that was in my fridge.

End-results - the cupcakes have a slight grape fragrance and it is not overly sweet. It would be better if I can try to make the grape flavour stand out more. As I didn't whisk my egg white well enough, the cupcakes were a little denser than normal. Oh well, practice makes perfect I suppose!

Here's the recipe...


Grape Chiffon Cupcakes (Yields 6 large cupcakes)

3/4 cup cake flour
90g sugar
1/2 tsp baking powder
1/8 tsp kosher salt
2 egg yolks
2 egg whites
1/8 tsp cream of tartar
2 tbsp vegetable oil or melted butter
1/4 cup grape juice
1/2 tsp vanilla extract


Directions

Preheat oven to 160 degree Celcius. Line your ramekins with large paper cups.

In a large mixing bowl, sift the cake flour and baking powder and set aside.


Whisk the egg yolks with 1/3 of the sugar until it turns a pale yellow colour. Add the vegetable oil, vanilla extract until well combine.


Add 1/3 of the flour into the egg yolk mixture, followed by 1/2 of the grape juice. Mix until combine. Then add 1/3 of the flour, remaining grape juice and the remaining flour. Mix until the ingredients are incorporated. Do not over-mix.


In a large clean bowl, whisk the egg whites, salt and cream of tartar (must use clean whisk, it would be easier to use an electric whisk) until soft peak. Add the remaining sugar gradually and beat until stiff peak.

Fold in the egg white in 3 batches until just combine. Do not over-fold.

Pour the batter into the prepared ramekins. Bake for 30 mins at 160 degree Celcius or until an inserted toothpick comes out clean.


Cool on wiring rack.


Enjoy!


Soft White Bread Using Bread Machine


I bought a bread machine sometime ago but was so busy to give it a "opening ceremony" until a couple of days ago. I was thinking of what bread to do on my first try as I have gotten a few bread machine recipes. In the end, scardy-cat me decided to try the recipe that comes with the bread machine first. That will be more or less fool-proof! :P

End-results - the bread is soft and has a slight sweet fragrance to it. I left aside a slice of bread to test the softness and the bread started to harden a little by the next evening. So all in all, this is a pretty good recipe to keep.


After I posted the bread pictures, I was pretty surprised that quite a few people asked for the recipe and of course, I am very happy to share it here with everyone. However. due to the different brand of bread machines, do check on your dough after it kneaded for around 20 mins and adjust the amount of flour and water accordingly (1 tablespoon at a time). :)

Here's the recipe...


Soft White Bread Using Bread Machine (Yields 450g loaf using DonLim BM1230 Bread Maker)
Recipe from DonLim Recipe Book

240g bread flour
36g sugar
1/3 tsp salt
1/2 tbsp milk powder
16g butter
1 egg
120g water
5g yeast


Directions

Add the ingredients to the bread machine in the following order:

- water
- egg
- salt (at one corner)
- sugar (at another corner)
- butter

Add the bread flour to the machine, ensuring it covers the whole wet area.

Make a small well in the middle and add the yeast. Ensure the yeast do not touch the salt.

Using Menu 6 (soft bread function), select the colour of the crust and the loaf size. For my case, I chose medium crust and 450g loaf.

When bread is done, take out the bread tin and invert immediately on a cooling rack and leave to cool. Once cool, unmount it from the tin by tapping at all sides of the tin and slide the loaf out.


Loaf is good to leave outside for max. 3 days, that is if it lasted that long. If you want to keep longer, store in zip-lock bag and refrigerate.

Enjoy! 

Thursday 3 July 2014

Cola Braised Korean Chicken


When Betty J Woo of Singapore Home Cooks Facebook Group recommended this recipe on Facebook in May and I was amazed that cola could be an ingredient to braise chicken! I immediately put in on my to-do list and promised myself I had to try it as soon as possible. But, I was soon plagued with sickness and with the then June holidays came. It slipped out of my mind.

So when Zoe of Bake for Happy Kids invited me to join the Little Thumbs Up event (Potato), I was quite stumped on what should I submit as this is my first time participating in this type of events. I looked through my recipes and I suddenly remembered this dish. And I decided....this shall be my dish!

It was actually cooked on a very tight schedule, as I had classes after sending my kids to the in-laws in the late afternoon. So I definitely had to cook this before I left home. This Cola Braised Korean Chicken by Beyond Kimchee was so easy to prepare that I was able to complete the dish before I had to bring the kids over. I had made some minor adjustment to the ingredients of the recipe by adding black fungus and changing the rice wine for hua diao wine. I also changed a little of the process of cooking. The original recipe calls for blanching of the chicken before braising but I prefer browning my chickens to have that rustic taste. I also add the vegetables into the braising sauce before the chicken as I used chicken wings this round and that requires lesser cooking time.

Verdict at dinner time was fantastic. My elder son, who is not so into braised chicken, had 6 - 7 chicken wings and was still begging for more. Everyone loves the dish! Both the black fungus and the sweet potato noodles soak up all the flavors of the sauce and they just taste so heavenly. The slurping of the flavorful noodles is something you would not want to miss.

Adding of the dried chilli definitely brings up the oomph in this dish. For me, I just added 2 for the benefit of my younger kid. If you are the type that likes a little extra spiciness, feel free to add more dried chilli.


Here's the recipe...


Cola Braised Korean Chicken (Serves 4 - 6)
Original recipe from Beyond Kimchee

1 kg chicken thighs, bone-in and cleaned. (I used chicken wings this round)
100g Korean sweet potato noodles
450g small whole potato (you can use large potato if you like. Cut into large chunks)
2 carrots, cut into 1 1/2" chunks
1 large onion, halved and quartered then separate the pieces
5g dried black fungus, washed and soaked. (you can also use fresh fungus as well)
4 - 7 dried chillies or fresh chillies without the stem
500ml cola ( I used slightly more, around 700ml)
2 tbsp soy sauce (I used good and thick dark soy sauce)
2 tbsp rice wine (I used Shaoxing wine)
1 tbsp minced garlic
1 tsp fresh minced ginger


Directions

Soak the Korean noodles in warm water to soften it. Set aside to be used later.


In a medium-sized pan, brown the chicken wings on both sides. Remove from pan and set aside.


In a braising pot, combine the coke, soy sauce, garlic and ginger together.


Add the potatoes, carrots and black fungus. Bring to boil.


When come to boil, return the chicken wings to the pot. Add onions and stir to coat evenly.


Cover with a lid and simmer over medium-low heat for 20 mins. By this time, the vegetables should already be soft.


Raise heat to medium or medium-high, add the noodles and continue to simmer for another 5 - 7 mins, stirring occasionally to prevent sticking to the pot.


 When sauce is reduced by half and vegetables become tender, turn off heat and allow the stew to rest for a few mins before serving.


A pretty easy and fool-proof recipe that warms the body especially on a chilly day. Though it is good on its own as a one-pot dish as it has the sweet potato noodles (known as dangmyeon) inside, pairing it up with rice is equally nice.


Hope you like it, I definitely did! :)

This post is linked to the event, Little Thumbs Up organised by Doreen from my little favourite DIY and Zoe from Bake for Happy Kids, hosted by Jasline from Foodie Baker at this post.


Photobucket

Sunday 29 June 2014

Gula Melaka Huat Kueh (Prosperity Steamed Cake)


Recently, I discovered quite a number of people in Facebook are doing Huat Kueh. It makes me think of the time when I was young and my mum will buy the Huat Kueh whenever we pray to the gods. The Prosperity Steamed Cake or better known as Huat Kueh is commonly used for offerings during ceremonies and during Chinese New Year celebrations. The cakes are usually light or dark brown in colour. Leavening during the production process produces a "bloom" that symbolize prosperity.


My nephew and niece loves eating Huat Kueh and often pester their mum to get them the kueh. So seeing all the posts online makes me start thinking that I should try to make some. I sourced through the web in search of a good recipe to follow but there were just too many different variations. In the end, I decided to ask my mother-in-law for her recipe. She provided me the recipe with all ingredients being estimated (common with the older folks) so based on that, I came up with this recipe and viola! Smiling Huat Kuehs that filled the room with the fragrant smell of gula melaka and pandan.

My niece and my hubby couldn't wait to taste the kuehs and they gave me the thumbs up after trying it. This is a big compliment from my niece as she can be very fussy about her food. I'm definitely going to use this recipe again!


Here's the recipe...

Gula Melaka Huat Kueh (Makes 5 muffin-sized kuehs)

200g self-raising flour
200ml coconut milk
140g Gula Melaka (palm sugar)
1/3 cup water (about 75ml)
1 tsp baking powder
4 - 5 pandan leaves, washed and bundled up.


Directions

Add the pandan leaves, coconut milk, water and gula melaka in a pan and cook with low heat until the gula melaka dissolved completely. Stir continuously during cooking to prevent the sugar from burning.


Prepare a steamer or large wok that can steam for about 25 mins (pre-heat plus actual steaming time) with sufficient water. Pre-heat the steamer.

In a large mixing bowl, sift the self-raising flour and baking powder. Add the gula melaka mixture and stir with a whisk until completely mixed.


Lined the muffin tray with liners and transfer the batter to the cups. You should fill the cups until almost to the brim.


Steam in the steamer using high heat for about 20 mins or until a skewer comes out clean. Off the heat and leave the kuehs in the steamer for another 1 min before removing it from the steamer.


The kuehs are best eaten hot. If you would like to store the kuehs for a couple of days, cling wrap it when cooled and refrigerate them. Steam it for a few mins and the kuehs will be nice and moist again!


Thursday 19 June 2014

Roasted Thai Barbecue Chicken

So sorry for the long hiatus. I was sick and also got quite busy during the holidays ferrying the children to and fro their activities.

I use pre-mix occasionally and I have got to agree that for busy mums who juggle between work, children and house chores, pre-mixes are savers.

Previously someone shared on one of the Facebook cooking group that I am following, a pre-mix for Thai Barbecue Chicken. The picture posted looks absolutely delicious that I really was tempted to give it a try. My family loves Thai food and so I decided that I just have to give it a try!


It is really simple and the result is absolutely stunning! The chicken was flavorful, tender and juicy. My family have nothing but praises for the chicken and they wiped of every single piece of meat that was on the chicken drumsticks.


Roasted Thai Barbecue Chicken

900g of chicken drumsticks (you can change it to chicken wings or chopped chicken parts)
2 tbsp vegetable oil
1 packet Thai Barbecue Chicken marinade


Directions

Marinate the chicken drumsticks with the marinade and vegetable oil. Cover and leave for at least two hour. Best results to refrigerate it overnight.

Pre-heat oven to 190 degree Celsius and roast for 30 - 45 mins or until cooked. Baste at least twice with remaining marinade. (I roasted mine for about 50 mins as I used big drumsticks. I baste the chicken during roasting for 3 times. first time was with remaining marinade and subsequently was with the juice that was released during roasting.)


Give it a try! However do note, the chicken is a little spicy. So if you have little kids who cannot take spicy food, you have to prepare another dish for them while you enjoy this dish.

Thursday 22 May 2014

Potato Oatmeal Tuna Balls


I think I mentioned this before, I LOVE looking at recipes. However, with so many recipes available, both online and in print, it's hard to try all due to my hectic schedule. So I prioritize which to try first. Most of the time the easier ones, with ingredients readily available.

Saw this recipe in a recipe book at Popular bookstore and immediately decided to try this dish because it is just so easy! I also have some oatmeal cereals at home and it's just the perfect dish to help use up the oatmeal.

Here's the recipe...

Potato Oatmeal Tuna Balls (Makes 20 balls)

300g potatoes
1/2 can tuna chunks (about 92g)
1/4 cup corn
1/2 small red onion, diced
1/4 cup panko breadcrumbs
1 cup oatmeal
1 tbsp mayonnaise
salt and pepper to taste
Oatmeal (for coating)

For the dipping sauce (Mix well):

1/4 cup mayonnaise
1tbsp lemon juice
1 tbsp honey
sugar and salt to taste


Directions

Boil potatoes in boiling water for 20 mins. Coarsely mash potatoes with a fork.


Pre-heat oven to 200 degree Celsius.

Mix remaining ingredients (except the oatmeal for coating) with the mashed potato and shape mixture into balls.

Coat the balls evenly with oatmeal.


Bake the potato balls for 15 mins or until golden brown.

Serve with dipping sauce.


Note: I did not credit the author of the recipe because I did not purchase the book but did the dish based on my memory of the recipe. I shall re-visit the bookshop soon and shall note down the author's name and book title for credits. Thanks!